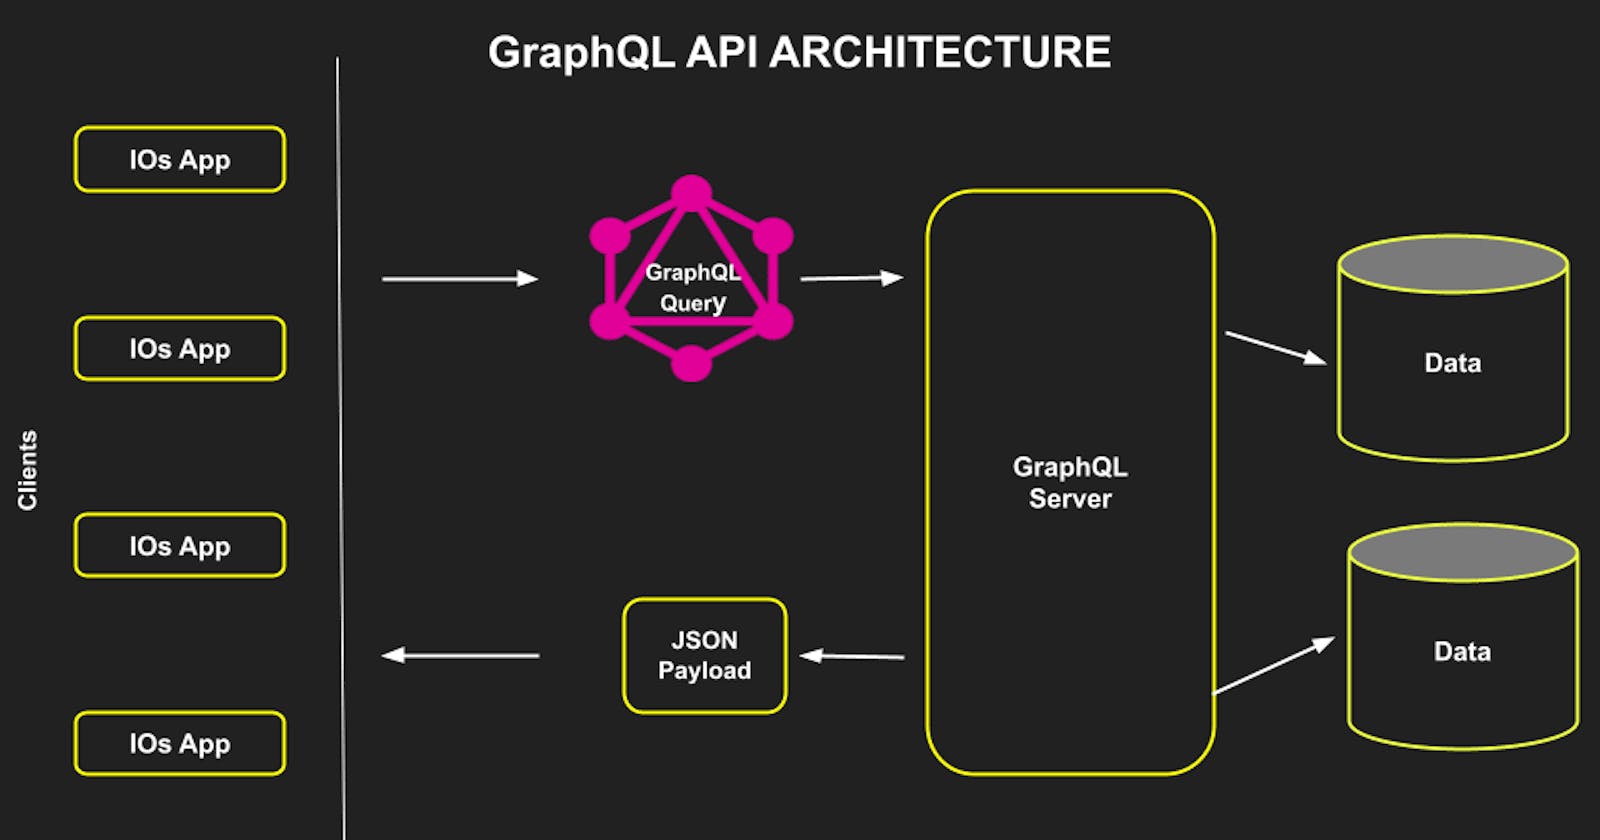
This guide will help you set up GraphQL in your NestJS application. It will cover the installation, configuration, and basic usage of GraphQL with NestJS.
Why GraphQL over REST?
In traditional REST APIs, you might end up over-fetching or under-fetching data. Over-fetching is when the client downloads more information than is actually needed in the app. Under-fetching is when a specific endpoint doesn’t provide enough of the required information. The client will need to make additional requests to fetch everything it needs. But with GraphQL, you can ask for exactly what you need and get just that. This makes GraphQL efficient.
Approach : Schema First Approach
Installation
- Install the required dependencies using npm:
npm install @nestjs/graphql @nestjs/apollo @apollo/server graphql
These packages are necessary to set up a GraphQL server. @nestjs/graphql is a NestJS module for GraphQL, @nestjs/apollo is a NestJS module for Apollo, @apollo/server is a community-driven, open-source GraphQL server, and graphql is the JavaScript reference implementation for GraphQL.
Configuration
- Import GraphQLModule
- Open the
app.module.tsfile and import theGraphQLModule.
import { ApolloDriverConfig, ApolloDriver } from '@nestjs/apollo';
import { Module } from '@nestjs/common';
import { GraphQLModule } from '@nestjs/graphql';
import { BookResolver } from './book/book.resolver';

@Module({
  imports: [
    GraphQLModule.forRoot<ApolloDriverConfig>({
      driver: ApolloDriver,
      playground: true, // Set to false in production. It enables the GraphQL Playground where you can test your queries.
      typePaths: ['./**/*.graphql'], // Specify the location of GraphQL files. It tells the server where to find our type definitions.
    }),
    BookResolver, // Import the resolver. Resolvers handle the incoming GraphQL queries.
  ],
  controllers: [],
  providers: [],
})
export class AppModule {}
Usage
Follow these steps to create a basic GraphQL module, resolver, and schema:
- Create a Module
- Create a new module for your GraphQL entities (e.g.,
book.module.ts).
import { Module } from '@nestjs/common';
import { BookResolver } from './book.resolver';

@Module({
  imports: [],
  controllers: [],
  providers: [BookResolver], // Import the resolver. Resolvers are responsible for defining how the fields in the schema are populated.
})
export class BookModule {}
- Create a Resolver
- Create a new resolver for your GraphQL queries and mutations (e.g.,
book.resolver.ts).
import { Query, Resolver } from '@nestjs/graphql';

@Resolver('Book')
export class BookResolver {
  @Query('books')
  getAllBooks() {
    return [
      {
        id: 1,
        title: 'Book 1',
        author: 'Author 1',
        price: 10,
      },
      {
        id: 2,
        title: 'Book 2',
        author: 'Author 2',
        price: 20,
      },
      {
        id: 3,
        title: 'Book 3',
        author: 'Author 3',
        price: 30,
      },
    ];
  }
}
In the above code, @Resolver('Book') is a decorator that defines Book as a GraphQL object type, and @Query('books') is a decorator that defines a GraphQL query to fetch all books.
- Create a GraphQL Schema
- Create a new GraphQL schema file (e.g.,
book.schema.graphql).
type Book {
  id: ID!
  title: String!
  price: Int!
}

type Query {
  books: [Book]
}

type Mutation {
  addBook(title: String!, price: Int!): Book
}
This schema defines a Book type, a query to fetch all books, and a mutation to add a new book.
Testing
- Start the NestJS Server
- Run the NestJS server and navigate to
http://localhost:3000/graphql.
- Open the GraphQL Playground
- You should see the GraphQL Playground interface.
- Execute a Query
- Enter the following query in the playground:
{
  books {
    price
    title
  }
}
- View the Result
- Click the "Play" button, and you should see the following result:
{
  "data": {
    "books": [
      {
        "price": 10,
        "title": "Book 1"
      },
      {
        "price": 20,
        "title": "Book 2"
      },
      {
        "price": 30,
        "title": "Book 3"
      }
    ]
  }
}
This guide covers the basic setup and usage of GraphQL with NestJS. You can extend this example by adding more complex types, queries, and mutations based on your application's requirements.
Compare (Optional)
let's compare the syntax for CRUD operations in REST with Mongoose/Prisma and GraphQL:
- Create (POST in REST)
- REST with Mongoose:
app.post('/books', async (req, res) => {
  const book = new Book(req.body);
  await book.save();
  res.status(201).send(book);
});
- GraphQL:
mutation {
  createBook(title: "New Book", author: "Author Name") {
    id
    title
    author
  }
}
- Read (GET in REST)
- REST with Mongoose:
app.get('/books', async (req, res) => {
  const books = await Book.find({});
  res.send(books);
});
- GraphQL:
query {
  books {
    id
    title
    author
  }
}
- Update (PUT in REST)
- REST with Mongoose:
app.put('/books/:id', async (req, res) => {
  const book = await Book.findByIdAndUpdate(req.params.id, req.body, { new: true });
  res.send(book);
});
- GraphQL:
mutation {
  updateBook(id: "1", title: "Updated Book") {
    id
    title
    author
  }
}
- Delete (DELETE in REST)
- REST with Mongoose:
app.delete('/books/:id', async (req, res) => {
  const book = await Book.findByIdAndDelete(req.params.id);
  res.send(book);
});
- GraphQL:
mutation {
  deleteBook(id: "1") {
    id
    title
    author
  }
}
- Read a Single Item (GET in REST)
- REST with Mongoose:
app.get('/books/:id', async (req, res) => {
  const book = await Book.findById(req.params.id);
  res.send(book);
});
- GraphQL:
query {
  book(id: "1") {
    id
    title
    author
  }
}
In GraphQL, you can see that the operations are more concise and we can specify exactly what data we want to get back, which can lead to performance improvements. In REST, the server determines what data is sent back in each request, which can lead to over-fetching or under-fetching of data. However, REST can be simpler to use for simple APIs and doesn't require a schema definition like GraphQL does. Both have their uses depending on the situation.
